- CompressConvertAI PDF
- Organize
- View & Edit
- Convert from PDF
- Convert to PDF
- SignMoreScan
- Home
- ›
- ›How To Save a Word Document as PDF Without Comments
How To Save a Word Document as PDF Without Comments
Save a Word document as PDF without comments or markup. Share clean, review-ready files while keeping your feedback for your eyes only.
When you send a document for review, you might want two different versions. One version shows every comment and tracked change. The other is a polished PDF with no comments at all.
Knowing how to switch between these modes in Word saves time and avoids awkward mistakes, like sending a client all your internal notes.
Below, we walk through how to save a Word document as PDF without comments, how to create a PDF with comments on purpose, and how our PDF Converter and PDF Annotator help you manage both versions.
Quick Guide: Save a Word Document as PDF Without Comments
If you only need a fast answer, follow these steps in Word before conversion.
Step 1: Hide Comments And Markup
You control comments from the “Review” tab.
Open your Word document.
Go to the “Review” tab.
Click “Show Markup” and clear “Comments” and “Track Changes.”
Make sure the display is set to “Simple Markup” or “No Markup.”
Now the page view matches what you want in the final PDF.
Step 2: Save or Print To PDF Without Comments
Once comments are hidden, export the PDF.
Go to “File” > “Save As” and choose “PDF,” or
Go to “File” > “Print,” choose “Microsoft Print to PDF,” then click “Print.”
Because markup is turned off, the PDF you create will not show comments or tracked changes.
How To Save a Word Document as PDF Without Comments
Sometimes you want more control than a quick toggle. This section explains the process more slowly so you can check everything.
Check Comment And Markup Settings
Start by making sure nothing you want to hide is visible.
Switch to “Print Layout” view, so you see the page as it will print.
Open the “Review” tab.
In “Tracking,” choose “No Markup” if you want a completely clean view.
Open “Show Markup” and clear “Comments,” “Insertions and Deletions,” and any other items you do not want in the PDF.
Take a moment to scan through the document. If you still see balloons or red lines, adjust the settings again until the pages look final.
Save as PDF Without Comments
Saving directly to PDF is the simplest way to create a clean copy.
Go to “File” > “Save As.”
Choose the folder where you want to store the PDF.
In the “Save as type” menu, select “PDF.”
Give the file a name that makes sense, such as “Proposal_clean.pdf.”
Click “Save.”
Word uses the current markup view when it creates the PDF. With comments hidden, the exported file is comment-free.
How To Print Word to PDF With or Without Comments
Sometimes you prefer the “Print” route, especially on Windows and Mac. The logic is the same: what you see in the print preview is what ends up in the PDF.
Print Word To PDF Without Comments
For a clean PDF using the print path:
Open your document in Word.
Confirm that markup is hidden, as described above.
Go to “File” > “Print.”
On Windows, pick “Microsoft Print to PDF” from the printer list.
On Mac, click the “PDF” button in the print dialog and choose “Save as PDF.”
Click “Print” or “Save,” then choose a file name and location.
The PDF will match the print preview, so comments and balloons stay out if they are not visible in that preview.
Print Word To PDF With Comments
Sometimes you want reviewers to see comments in the PDF. In that case, turn them back on before you print.
Go to the “Review” tab.
Set the display to “All Markup.”
Open “Show Markup” and make sure “Comments” and “Insertions and Deletions” are checked.
Check the page to confirm that balloons and markup lines are visible.
Go to “File” > “Print” and choose your PDF printer, as above.
The resulting PDF will include comment balloons at the side of the page along with tracked changes.
Print Word To PDF On Windows And Mac
Both platforms let you print to PDF without extra software, as long as you know where to look.
Print Word To PDF on Windows
Windows includes a virtual printer called “Microsoft Print to PDF.”
Open your Word document.
Press “Ctrl + P” or go to “File” > “Print.”
In the printer dropdown, select “Microsoft Print to PDF.”
Adjust settings such as orientation or page range if needed.
Click “Print,” pick a folder, and name your PDF.
This creates a PDF file on your computer instead of sending pages to a physical printer.
Print Word To PDF on Mac
On Mac, the PDF options are built into the print dialog.
Open your Word document.
Press “Cmd + P” or go to “File” > “Print.”
In the bottom left of the print window, click the “PDF” button.
Choose “Save as PDF.”
Enter a file name and pick a location, then click “Save.”
The PDF matches the current layout and markup settings from Word.
Save as PDF vs Print To PDF
Both paths create a PDF, but they behave slightly differently.
When To Use Save as PDF
Save As PDF is best when:
You want a direct export from Word with minimal extra steps.
You plan to keep most of Word’s default PDF settings.
You are already adjusting markup in the main document view.
When To Use Print to PDF
Print to PDF is better when:
You care about exact print layout and page breaks.
You want to define page ranges, such as only a few sections.
You are used to controlling comments and markup from the print preview.
In both cases, it helps to treat the preview as the final check. If something looks wrong there, fix it before creating the PDF.
Use Smallpdf When Word Is Not Available
If you receive a DOCX file but do not have Word installed, you can still create a clean PDF version.
Convert Word To PDF Online
Our Word to PDF feature runs in the browser, so you can work from almost any device.
Open the Word to PDF page.
Use the converter below to upload or drag-and-drop your Word file and turn it into a PDF in your browser.
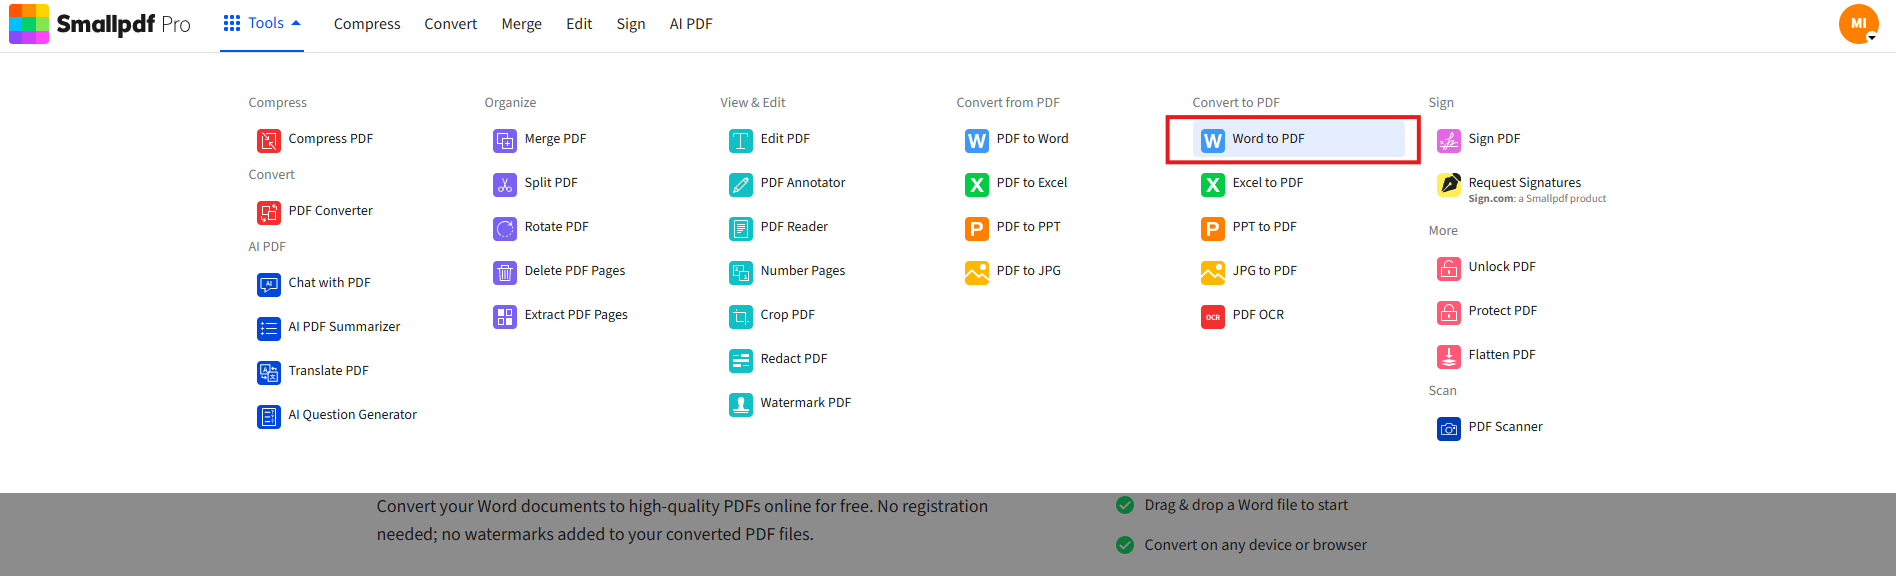
Drag and drop your .doc or .docx file, or import from Google Drive, Dropbox, or OneDrive.
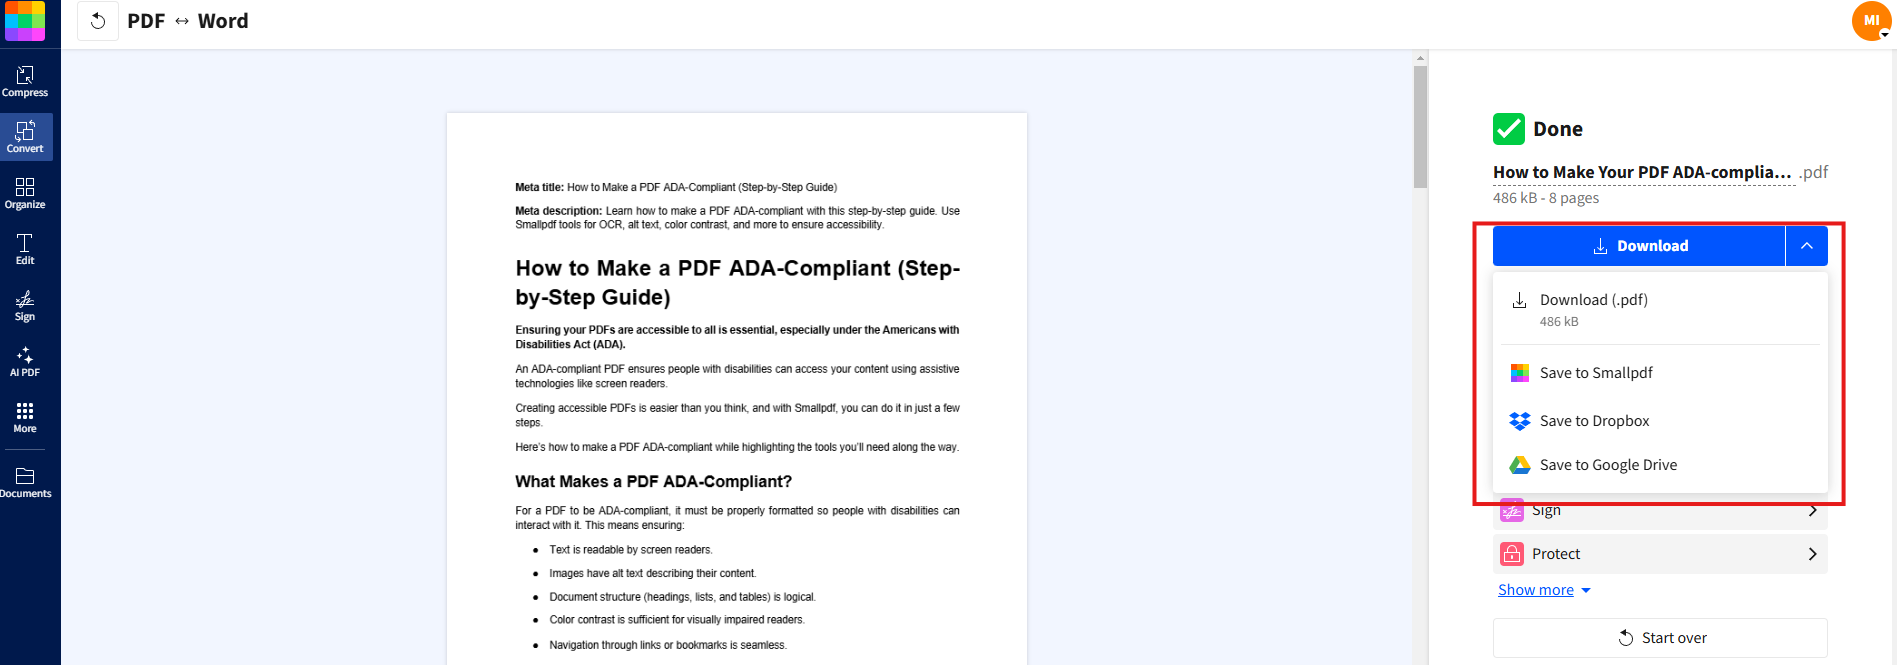
Wait while we convert the document.
Download the PDF or save it to cloud storage.
Troubleshooting Word To PDF Conversion Problems
Even with the right steps, things can go wrong. Here are common issues and practical fixes.
Microsoft Print To PDF Is Missing
If you do not see “Microsoft Print to PDF” in Windows:
Open “Settings” > “Apps” > “Optional features.”
Click “Add a feature.”
Search for “Microsoft Print to PDF” and install it.
Restart Word and check the printer list again.
You can always go back to our Word to PDF feature while you fix the printer entry.
PDF Printer or Driver Does Not Work
If the PDF printer appears but fails:
Run the Windows printer troubleshooter from “Settings” > “Update & Security” > “Troubleshoot.”
Restart the Print Spooler service from “Services.”
Check for Windows updates and driver updates in “Device Manager.”
If printing still fails, saving as PDF from Word or using the Smallpdf Word to PDF converter is usually faster than debugging deeper system issues.
Comments Do Not Show In The PDF
If you expect comments and do not see them after conversion:
Confirm that Word is set to “All Markup” in the “Review” tab.
Make sure “Comments” is checked in “Show Markup.”
Use “Print Layout” view, not “Draft” view, before printing to PDF.
If comments show up in print preview but not in the resulting file, try the Save As PDF path instead of Print to PDF, or use PDF Annotator to add comments directly to the PDF.
PDF File Is Too Large
Large images and long documents can create heavy PDFs. To keep file size manageable:
Compress pictures in Word before exporting.
Limit printing to the necessary pages when you only need a section.
Run the finished PDF through Compress PDF to shrink it without losing readability.
This helps with email limits and speeds up uploads to shared drives.
Make Review-Ready PDFs From Word
Once you know how to save a Word document as PDF without comments, you can control exactly what people see at each stage of a project. Send clean PDFs for clients, keep annotated versions for your team, and move between Word and PDF whenever you need.
We help at each step. Convert Word files to PDF in a browser, compress them for faster sharing, and use PDF Annotator or eSign when you need comments or signatures in the final version. That way, your PDFs stay professional, readable, and ready for anyone who opens them.
Convert Word to PDF for Free
Frequently Asked Questions
How do I remove comments when printing Word to PDF?
Hide markup before you create the PDF. Go to the “Review” tab, choose “No Markup”, and clear “Comments” in “Show Markup.” Then use “Save As” > “PDF” or print to PDF. The exported file will not show any comment balloons.How do I save a Word document as PDF without comments?
Set the display to “No Markup” in the “Review” tab, confirm that comments are hidden, then go to “File” > “Save As” and choose “PDF” as the format. Give the file a name and save it. The PDF version will be clean and comment-free.Why are comments still showing in my PDF?
If comments appear in the PDF, Word was likely set to “Simple Markup” or “All Markup” at the time of export. Switch to “No Markup” and clear “Comments” in “Show Markup”, then recreate the PDF. Also, check the print preview to confirm that balloons are gone.Can I print Word to PDF and keep comments visible?
Yes. In the “Review” tab, set “All Markup” and ensure “Comments” is checked in “Show Markup.” Switch to “Print Layout” view, then print to PDF. The output will include comment balloons and tracked changes along the margins.How do I hide comments when exporting Word to PDF on Mac?
On Mac, the markup settings are the same as on Windows. Use the “Review” tab to choose “No Markup” and hide comments, then press “Cmd + P” and use the “PDF” button to “Save as PDF.” The exported file will match whatever you see in the print preview.What can I do if Word will not print to PDF at all?
If Word cannot print to PDF, try saving as PDF instead, or upload the document to our Word to PDF feature. While you investigate printer settings and drivers on your system, online conversion keeps your work moving and still produces a professional PDF.Convert Word to PDF without comments using Smallpdf
